|
| |
Welcome to How To Build A Computer From Parts Site!
How To Build A Computer
by Mike D. Matteri
These instructions will show an individual how to build a computer. The
steps involved will go up to plugging in the computer.
There are a couple of problems and solutions associated with building a
computer. These are as follows:
1) Problem: Static electricity is the number one cause of most problems when
it comes to building a computer. Static electricity can damage the system board,
Random Access Memory (RAM) chips, hard drive, Central Processing Unit(CPU), and
all computer cards such as the video card, sound card, and modem.

Solution: Remove all jewelry. Discharge the electricity by touching the
power supply before touching the system board, RAM, hard drive, computer cards,
or the CPU. You must also have an Anti-Static mat to keep static electricity
away from all parts of the computer. You can also wear an Anti-Static strap on
your wrist to discharge the electricity. You can find the Anti-Static mat and
the Anti-Static strap at any computer store or an electronic repair store.
2) Problem: Additional problems include such things as: (a) bad connections;
(b) wrong jumper settings; (c) improperly seated computer cards, RAM, and CPU.
Solution: Make sure that all computer cards, RAM, and CPU are properly
seated by looking in the systemboard manual. You can also find the right jumper
settings in the system board manual.
Before you start building the computer, please keep in mind that you must
have all parts before assembling the computer. The parts that you need are the
following:
1) Computer Case
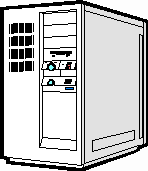
(See Picture Below)
2) System board
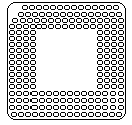
3) CPU(Central Processing Unit) This is the brains of the computer that
process information. (See Picture Below) with a cooling fan that sits on the
CPU. This fan prevents the CPU from overheating.
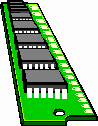
4) RAM(Random Access Memory) [This is a bank of chips that allow you to run
programs on the computer, and is very easy to remove and install on the system board.
Please refer to the system board manual for the proper installation or removal
of these chips.] (See Picture Below) CAUTION: Be sure that you have the correct
RAM for your type of application. This information can be found in your system board
manual.
5) Video Card (This card allows you to view pictures and text on your
monitor, and has a plug-in on the card to hookup your monitor.)
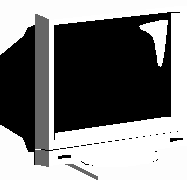
6) Color Monitor (This is a miniature television screen that allows you to
view pictures and text in front of you. See Picture Below)
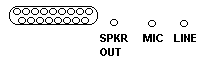
7) Sound Card (This card allows you to listen to sound on your speakers. It
has plug-ins for your speakers, a microphone, and a joystick. See Picture Below)
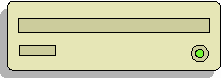
8) CD-ROM Drive (This is a drive that allows you to install programs into
the computer, and listen to music. See Picture Below)
9) 3 1/2 Floppy Disk Drive (This is a drive that allows you to install
programs into the computer, and save files. See Picture Below)

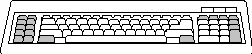
10) Windows 95 Keyboard (This allows you to type information into the
computer and looks like a typewriter keyboard with a few more keys. See Picture
Below)
11) Hard Drive (This drive allows you to save programs, and is important to
have to run any program like Windows 95.)
12) All cables that come with the case
13) Depending on the system board, you can get either a PS-2( round
connection plug), or a Serial (square connection plug) mouse.(This is a device
that allows you to use a program like Windows 95. It is an input device. See
Pictures Below)
 
PS-2 Serial Connector
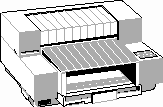
14) Color Printer (This is a device that prints out text and pictures. See
Picture Below)
15) Operating System Software like DOS (Disk Operating System), Windows 95,
or Windows 98.(The computer needs these programs to operate effectively.)
16) All documents, including the following manuals: CD-ROM, Motherboard,CPU,
Hard Drive, 3 1/2 Floppy Disk Drive, Color Monitor, Video Card, Sound Card,
Color Printer, and operating system. You can often refer to these manuals if you
have a question. If there is a question that you have, and it is not covered in
the manual, please call the manufacturer of that part, and they will tell you
what to do with that part of the computer and how to install it.
17) Computer Case Fan (This hooks up to the front of your case, plugs into
the power supply cable, and the CPU fan.)
18) Surge Protector with Telephone receptacles (This is very important. A
surge protector will help keep your computer files from being wiped out during a
power surge. Please remember to not overload it. This will cause a fire if you
do).
The first thing that you do when you are ready to start building the
computer is to unpack the computer case, remove all packing material, and set
aside all pieces that come with the case.
There are steps to do after unpacking the computer case and setting aside
all pieces.(I am referring to an ATX systemboard and case for these
instructions.):
1) Please remove the front and side panels on the computer case. This
procedure will be different for each computer case. Locate the little plastic
bag that has the different variations of Philips screws, plastic round feet with
stoppers, red washers, and brass covered connectors. Open up the bag and set
aside. (a) Take the different plates from the box that came with the case, and
look at them and compare them with the system board outlets such as the
printer(LPT1), mouse(PS-2), and keyboard(PS-2) connections. (b) If the plate
that is in the case does not match the connections for the mouse, keyboard, and
printer, please remove it from the case by being careful of the sharp edges when
removing the plate and gently working the plate back and forth until it is
removed. (c) Once the old plate is removed, replace it with the new plate that
fits around the connections for the mouse, keyboard, and printer by putting it
in the empty space then connecting the tabs on the case and sliding the plate
into that space.
2) Remove the brass covered connectors from the bag, and screw them into the
case in the corresponding holes on the metal sheet inside the case. (See
pictures below)

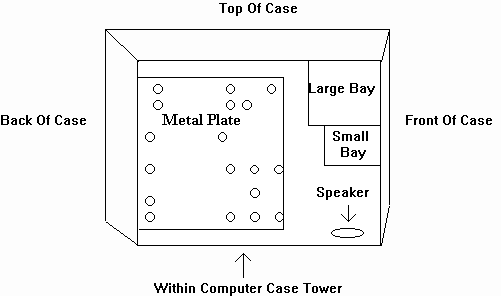
Take the plastic round feet with stoppers and place them in the 4 big holes
at the bottom of the computer case.
The following is a picture of the ATX system board. This is taken from the
Tyan ATX system board manual for use as an example.
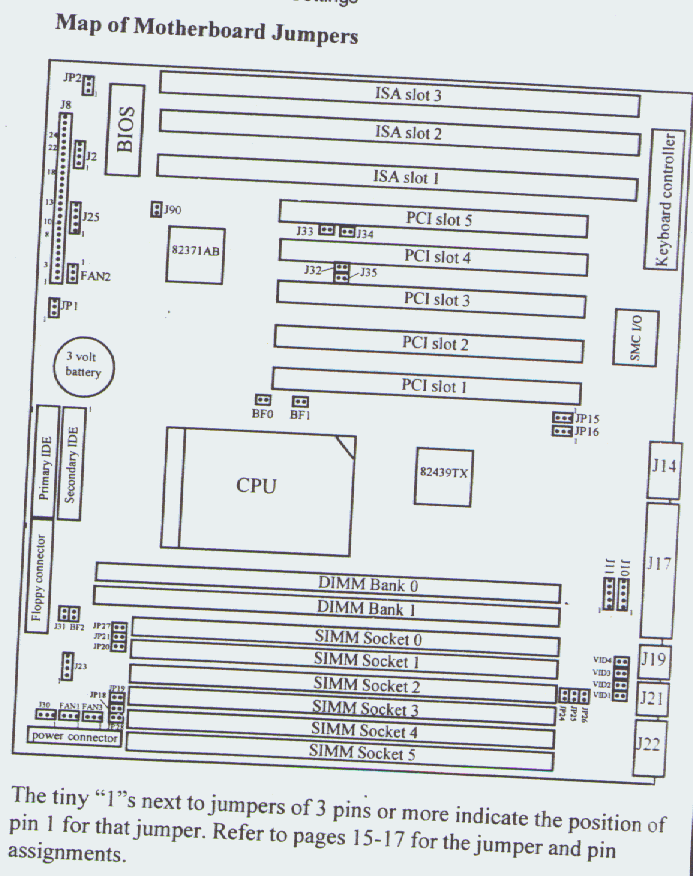
3) After the brass covered connectors are aligned with the holes on the system board,
take the raised Philips screws, and install the red washers on the raised screws
and screw them into place.
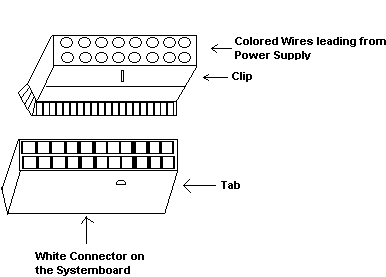
4) Attach the color coated wires to their pins. Please look in the system board
manual for the proper way to connect them. If you are still confused on where to
put the wires, please call the system board manufacturer's technical support,
and they will be happy to tell you where to attach the color coated wires.
5) To set the proper jumper settings for the CPU, please look in the system board
manual for the right settings for your CPU. [For example, a Pentium chip that is
200 megahertz(megahertz is how fast the processor will process information), it
has a BUS (This is how the processor, memory, and system board communicate with
each other.) speed of 66 megahertz. Multiply 66 times 3 and you get
approximately 200 megahertz. the way you multiply is by your CPU multipliers
(CPU multipliers are listed in the system board manual, and set the jumpers
according to them.)] If you are still confused about the proper jumper settings,
please call the system board manufacturer, and they will be happy to tell you
all about the jumpers and where they go on the system board. Please do the same
thing when you are setting the proper jumper settings for the communication
ports. remember, if you have any questions on the jumper settings, please call
the system board manufacturer and they will tell you the settings for your system board.
Please make sure that when you call, that you have the system board manual with
you, so they can help you with your system board.
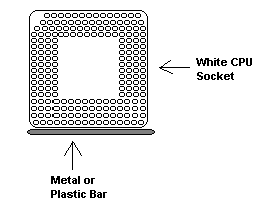
6) To install the CPU, locate the white square with a lot of holes on the system board.
These holes are where you put the CPU. To install the CPU, raise the metal or
plastic lever by pulling on it horizontally, until it is completely vertical.
The top plate will slide back to open up the socket. Align the CPU and socket
pin 1 corners of the white square. Insert the CPU into the socket. It should
slide in easily. If it does not, adjust the position of the lever a little.
Press the lever down. The top plate will slide into its original position. You
will feel some resistance as the CPU is secured into the socket. This is normal
and will not damage the CPU. The lever should snap into place at the side of the
socket. (See Picture Below)
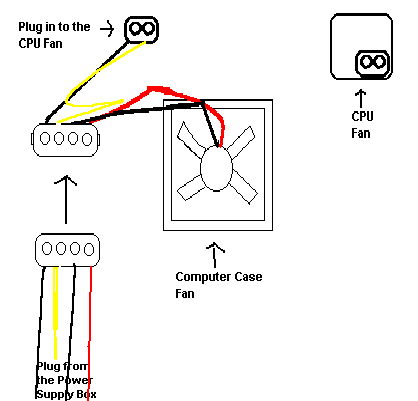
Please install the computer fan to the CPU fan. (See Picture Below)
7) To connect the power supply to the system board, align the plastic guide
pins to each other. This should snap into place. Please look at the system board
manual for the proper connection procedure. (See Picture Below)
8) Next, install the memory. There are different types of memory, but the 2
main types of memory are SIMM and DIMM. Both these types of memory allow you to
run programs on the computer. Without memory, the computer will not run.
SIMM (Single Inline Memory Module, this memory chip is a small band of chips
that has 72 pins in it, and fit inside the long, skinny white slots with metal
tabs on the end and is found on the system board. The DIMM (Dual Inline Memory
Module, memory chip is slightly bigger than the SIMM chip and has 168 pins. It
fits inside the long, skinny black slots with plastic tabs on the end and is
also found on the system board.) Please look at the system board manual for the
proper seating of the memory and also some details of memory installation. (See
Picture Below)
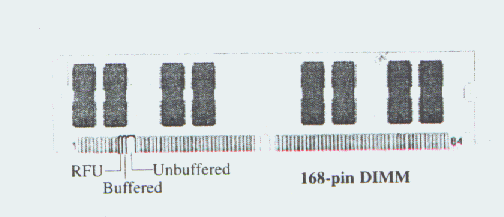
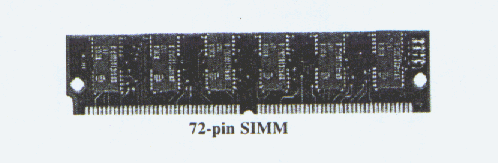
This is a picture of a DIMM This is a picture of a SIMM
9) Next, install the video card. Locate the PCI slot. (PCI stands for
Peripheral Component Interface or Interconnect. This is a fat white slot on the system board,
and allows the system board to communicate with the monitor to display graphics
and text on the monitor.) There is some more of those same slots on the system board.
These are used depending on the cards that you get from manufacturers. Most
video cards fit in the PCI slot. Remove the metal plate that is next to where
you are putting in the video card and set it aside.
Please remember to seat the card properly by pushing the card in gently back
and forth, until it snaps into place and secure it with a raised Phillips screw.
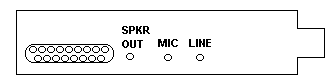
10) Next, install the sound card. Locate the ISA slot. (ISA stands for
Industry Standard Architecture. This is a fat, long black slot on the system board,
and allows the system board to communicate with the speakers to hear games and
web sites with music. It also has plugs for you to hook up the speakers to, it
also has a plug for you to connect a joystick, as well as a plug for a
microphone, so that you can use programs that you can talk to another person in
a program like NetMeeting. This saves on the telephone bill. ) There are some
more of those same slots on the system board. These are used depending on the
cards that you get from manufacturers. Most sound cards fit in the ISA slot.
Remove the metal plate that is next to where you are putting in the sound card,
and set it aside. Please remember to seat the card properly by pushing the card
in gently back and forth, until it snaps into place and secure it with a raised
Phillips screw. (See Picture Below)
11) The next thing that you do is to install the internal modem card. Locate
the ISA slot. (ISA stands for Industry Standard Architecture. This is a fat,
long black slot on the system board, and allows the computer to communicate with
another computer by use of a phone line). This is very important when you are
building the computer. There is some more of those same slots on the system board.
These are used depending on the cards that you get from manufacturers. Most
sound cards fit in the ISA slot. Remove the metal plate that is next to where
you are putting in the modem card, and set it aside. Please remember to seat the
card properly by pushing the card in gently back and forth, until it snaps into
place and secure it with a raised Phillips screw. (See Picture Below of what a
internal modem looks like)
12) Please install the hard drive, CD-ROM, and floppy disk drive next. The
best way to find out how to install these is to look in the manuals of the hard
drive, CD-ROM, and floppy drive. These manuals will tell you where you should
put the drives, and their connection on the system board. Please make sure that
you also look for the proper jumper settings on these drives. If you are
confused about where to put them or the instructions are unclear, please call
the manufacturers of those drives and talk with their technical support, and
they will help you with the installation.
13) Please put on the front and side panels back on the computer case. Screw
the raised Phillips screws into the case when the side panels are on, and put on
the front panels.
14) Plug the keyboard into the outlet. It should look like a big round oval
with a lot of holes in it. This is called the AT adapter (See Picture Below). If
it is a small oval, plug the keyboard into it, if the keyboard connection has
the same kind of shape. This is called the PS-2 adapter (See Picture Below). If
you have any doubt about it, please look in your system board manual.
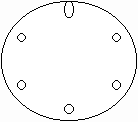
AT
Adapter
PS-2
15) Hook up the monitor to the square outlet with a lot of holes in it. That
outlet that you are plugging into is your video card, and allows you to view
text and pictures on your computer.(See picture below)

16) Hook up the 3 odd shaped plug into the computer case. This is your power
supply. Plug the other end into a Surge Protector. The Surge Protector prevents
your computer from getting zapped during a thunderstorm, but it is even better
to unplug it during a storm. (See picture below)

17) Plug in the mouse to either a square (Serial), or a round outlet (PS-2).
This will allow you to use your mouse. If you have any doubt about it, please
look in your system board manual. (See picture below)
Serial Connector PS-2 Adapter
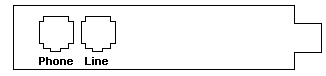
18) This step will tell you how to plug in the telephone lines into the
modem. Using a modem is important if you want to connect to the internet. The
shapes on the modem look like a regular phone jack receptacle. There are 2
receptacles and they are the Line and the Phone receptacle. Plug the one end of
the phone line wire leading from your phone jack into your surge protector that
has the label "phone". Plug the next telephone wire into the outlet
marked "Line" from your surge protector into the computer modem
receptacle marked "Line". Plug in another telephone wire from your
computer modem marked "Phone" into your phone, and you will be ready
to surf the internet. (See Picture Below)
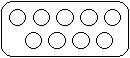
19) This step will tell you how to plug in the printer. Locate the printer
cable leading from your printer. It should have a connection that looks
something like the picture below. Plug it into the same sized slot on the back
of the computer (See Picture below).

Printer Connection (LPT1)
In order to set the computer up to find your hard drive, floppy drive, and
CD-ROM, please look in your system board manual.
I hope that you have had fun building a computer by following these
instructions.
I would like to mention the following sources that have helped me in putting
together these instructions. They are as follows:
Terry Batterton has showed me how to build a computer.
Intel Corporation for their fast and efficient technical support in helping
me decide how to set my CPU speed, and for sending me all the technical writing
that I needed for the CPU.
Tyan Corporation for their system board and the manual that came with it. I
researched a lot of stuff out of that manual, and used their instructions to
help write this. This company has helped me in trying to find out where the
color coated wires go on the system board.
Ability Computers for their help in trying to find out where the color
coated wires go on the system board.
Jeff McClain for his website of computer definitions and terms. His website
can be found at: http://jeffshardware.com.computerhardware.net/definitions.html
Computer Renaissance in Fayetteville, Arkansas for their help in researching
some computer definitions.
Dixieland Electronics in Bentonville, Arkansas for their help in researching
some computer terms.
Without the help of these people, corporations, and businesses, these
instructions would not have been made possible.

This page has been visited  times since April 23, 2001
If you would like to do a search on this subject, please use the form
below.
|